Installing ictVoIP Billing
ictVoIP Billing can be installed on WHMCS v8.5.x, v8.6.x, v8.7.x and v8.8.x running PHP7.4 and PHP8.1. Compatible with Apache and Litespeed. However this guide assumes you are starting with a basic install of WHMCS with https enabled and understand the administration of the WHMCS platform.
If you require the ictVoIP Billing addon module go here: ictVoIP Billing Software
ictVoIP Billing Addon Install
Downloading the ictvoip_billing_release-1.3.0_PHP7.4-8.1.zip from your client area licenses.
Upload the ictVoIP Billing addon module zip file to /home/$user/tmp.
i.e. Archive:
/home/$user/tmp/ictvoip_billing_release-1.3.0_PHP7.4-8.1.zip
/home/$user/public_html/admin/
/home/$user/public_html/admin/lang
/home/$user/public_html/admin/lang/overrides
/home/$user/public_html/images/
/home/$user/public_html/modules/addons/ictvoipbilling
/home/$user/public_html/modules/addons/ictvoipbilling/Actions
/home/$user/public_html/modules/addons/ictvoipbilling/Utility
/home/$user/public_html/modules/addons/ictvoipbilling/crons
/home/$user/public_html/modules/addons/ictvoipbilling/import
/home/$user/public_html/modules/addons/ictvoipbilling/tariff
MySQL Table Import
Import the Country Codes table to your WHMCS DB - mod_ictvoipbilling_country_codes.sql
License Activation
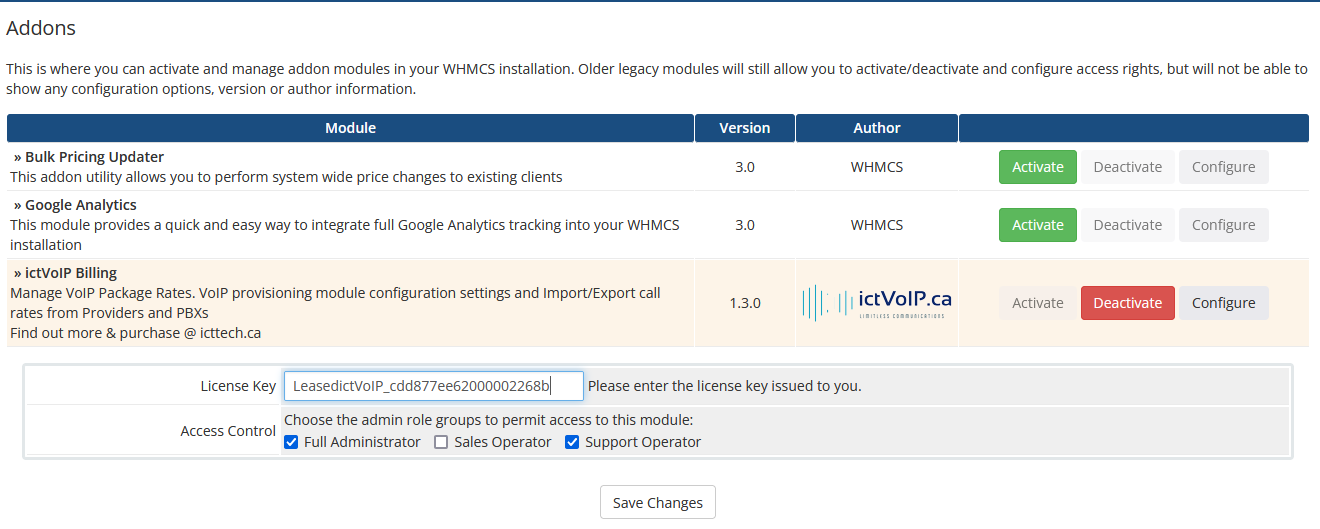
Activating the ictVoIP Billing System enter your license key into the following locations.
System Settings / Apps & Integrations / Addon Modules / - Click Activate then configure and enter your license and the appropriate Access control groups and save.
i.e.
LeasedictVoIP_a3174afbf93b3b8ba8f3

