Quick Install

Welcome to the ictVoIP Billing installation quick guide.
ictVoIP Billing can be installed on WHMCS v8.5.x, v8.6.x, v8.7.x and v8.8.x running PHP7.x and PHP8.1. Compatible with Apache and Litespeed. However this guide assumes you are starting with a basic install of WHMCS with https enabled and understand the administration of the WHMCS platform. This install has been designed to be fast, simple and modular, and generally takes 5 minutes or less. Install Video TBA. For a more comprehensive install and setup please refer to the WHMCS sections as outlined in the rest of this document.
Install ictVoIP Billing Addon
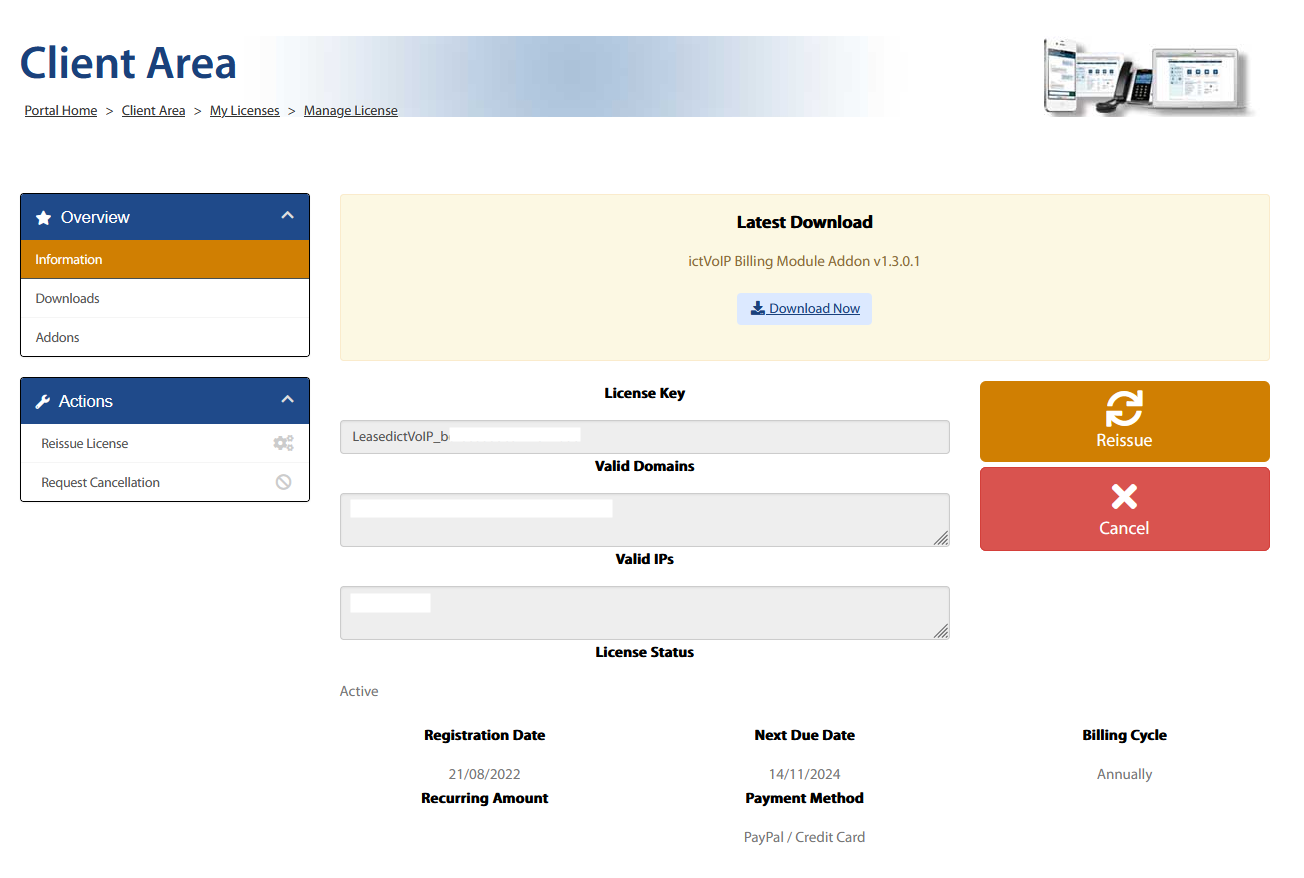
Downloading the ictvoip_billing_release-1.3.0_PHP7.4-8.1.zip from your client area licenses.
Upload the ictVoIP Billing addon module zip file to /home/$user/tmp.
i.e. Archive:
/home/$user/tmp/ictvoip_billing_release-1.3.0_PHP7.4-8.1.zip
/home/$user/public_html/admin/
/home/$user/public_html/admin/lang
/home/$user/public_html/admin/lang/overrides
/home/$user/public_html/images/
/home/$user/public_html/modules/addons/ictvoipbilling
/home/$user/public_html/modules/addons/ictvoipbilling/Actions
/home/$user/public_html/modules/addons/ictvoipbilling/Utility
/home/$user/public_html/modules/addons/ictvoipbilling/crons
/home/$user/public_html/modules/addons/ictvoipbilling/import
/home/$user/public_html/modules/addons/ictvoipbilling/tariff
MySQL Table Import
Import the Country Codes table to your WHMCS DB - mod_ictvoipbilling_country_codes.sql
Important - Licensing
Activating the ictVoIP Billing System enter your license keys into the following locations within your modules.
Make sure you have licensed you product by checking your client area.
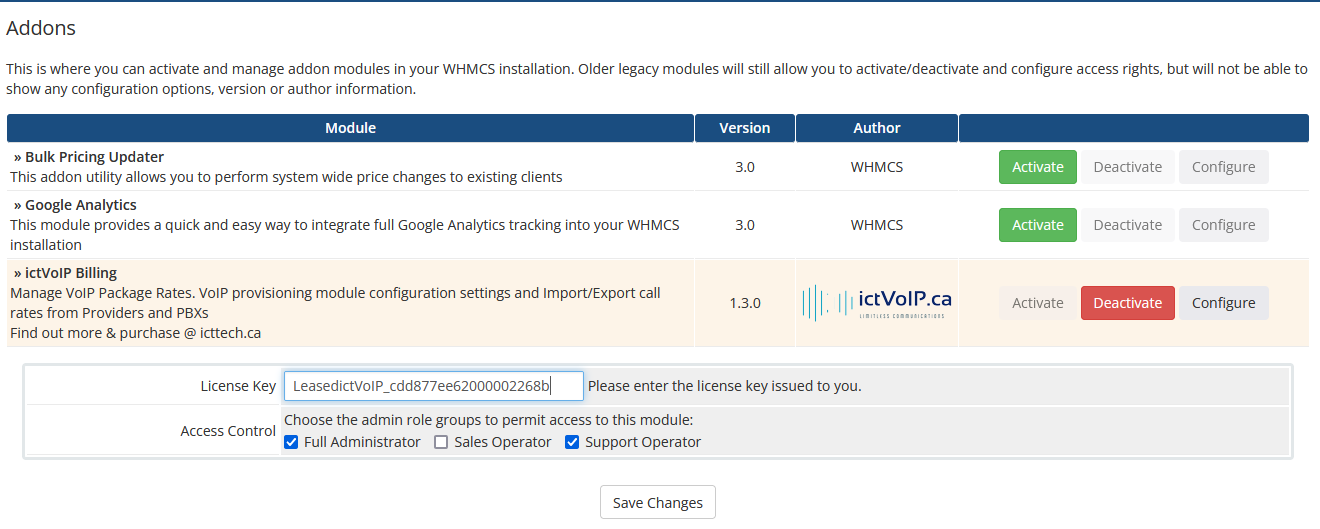
ictVoIP Billing Addon Activation
System Settings / Apps & Integrations / Addon Modules / - Click Activate then configure and enter your license and the appropriate Access control groups and save.
i.e. LeasedictVoIP_a3174afbf93b3b8ba8f3
FusionPBX Server Module
Current Supported versions of FPBX: v5.0.x & 5.1.x
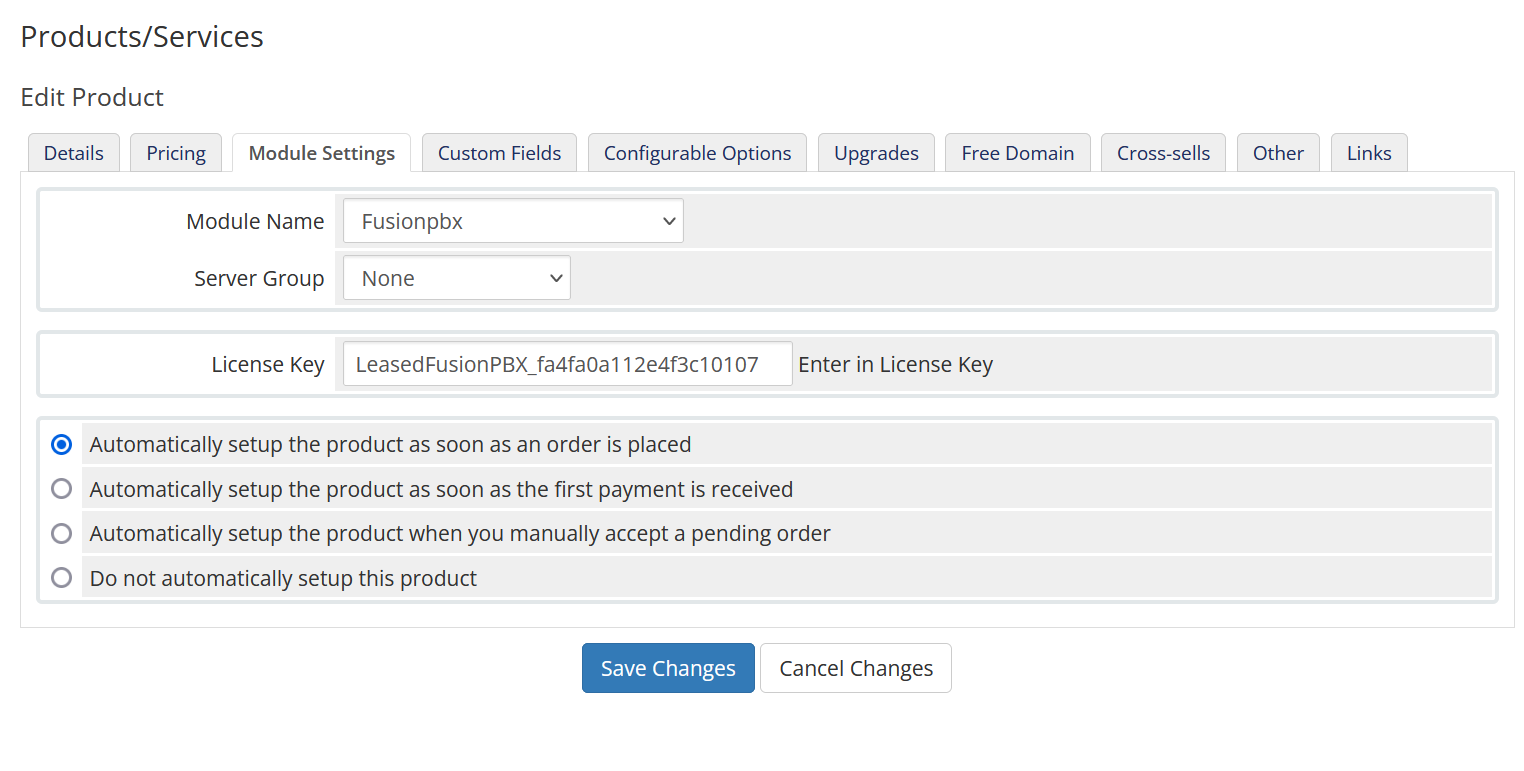
System Settings / Products & Services / - Create your new VoIP Product with description and with the Module Settings Tab, select Fusionpbx Module name and then place your License Key in the box, save.
i.e. LeasedFusionPBX_f14fa0a312e4fac10107
Instructions for installing the required APIs onto your FusionPBX host can be found here https://docs.ictvoip.ca/en/latest/admin/servers.html#installing-the-fusionpbx-api
Vodia Server Module
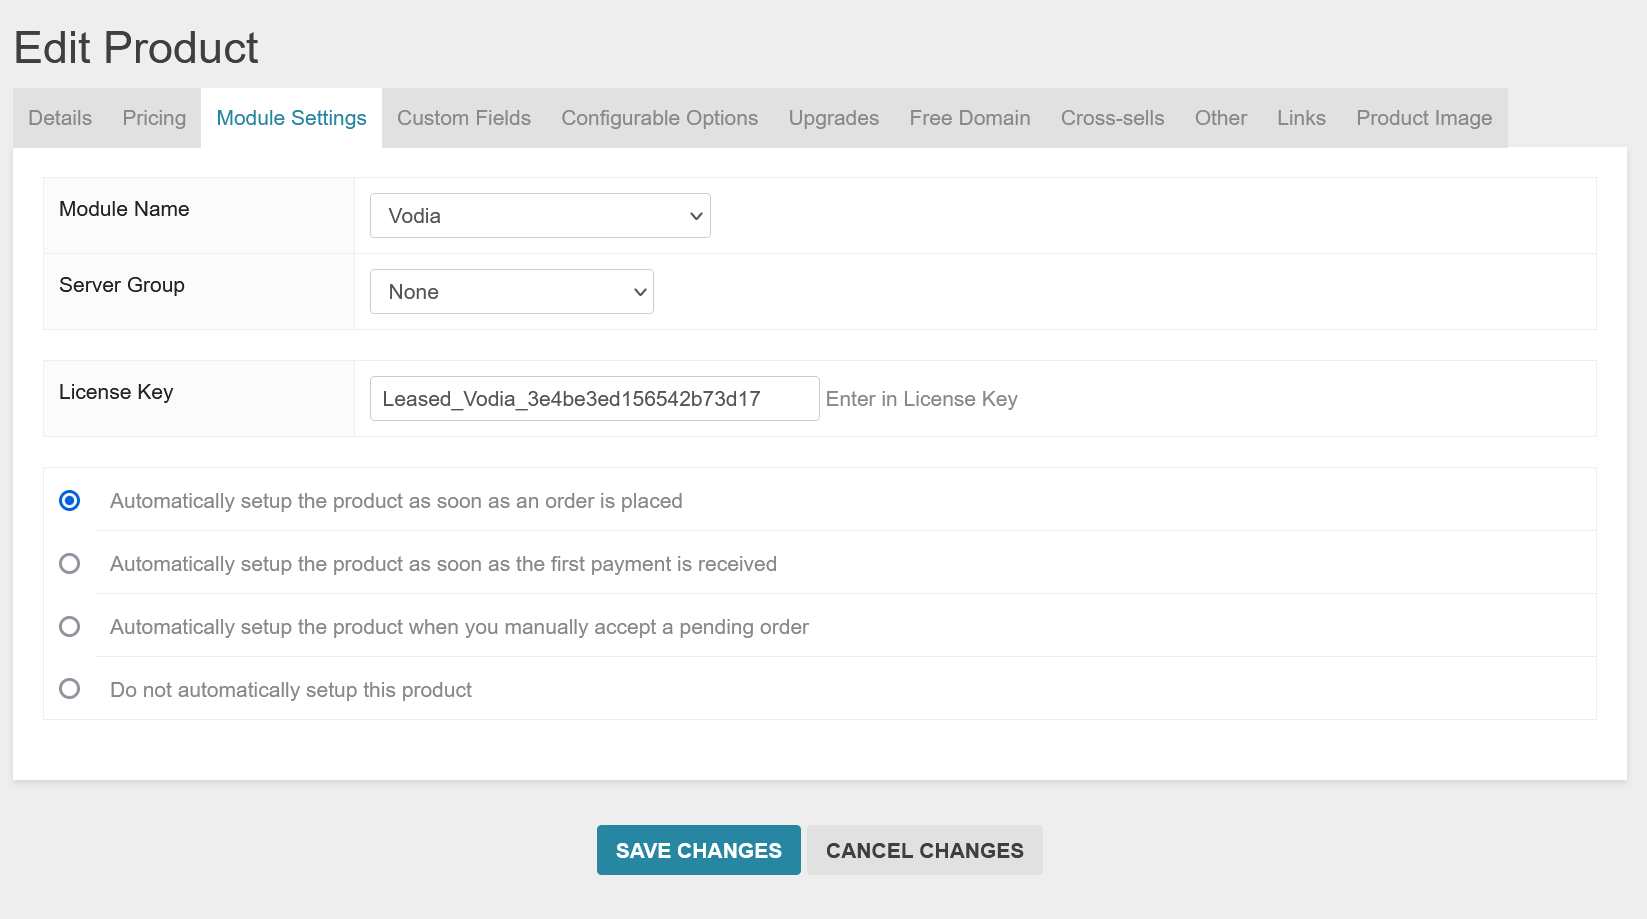
System Settings / Products & Services / - Create your new VoIP Product with description and with the Module Settings Tab, select Vodia Module name and then place your License Key in the box, save.
i.e. LeasedVodia_f14fa0a312e4fac10107
LesNet Server Module
System Settings / Products & Services / - Create your new VoIP Product with description and with the Module Settings Tab, select LesNet Module name and then place your License Key in the box, save.
i.e. LeasedLesNet_f14fa0a312e4fac10107
VoIPms Server Module
System Settings / Products & Services / - Create your new VoIP Product with description and with the Module Settings Tab, select VoIPms Module name and then place your License Key in the box, save.
i.e. LeasedVoIPms_f14fa0a312e4fac10107
VoIP Fax Server Module
System Settings / Products & Services / - Create your new VoIP Product with description and with the Module Settings Tab, select VoIPFax Module name and then place your License Key in the box, save.
i.e. LeasedVoIPFax_f14fa0a312e4fac10107
Special Notes:
.htaccess
.htaccess modification if Timeout Server error 500 is found when running with Apache or LiteSpeed. This can occur during large imports of Tariffs or CRON autobill execution on a large number of CDR records pulled from your PBX/Provider server module.
LiteSpeed
- To allow timeout overrides in Litespeed.
Modify .htaccess [LiteSpeed]
RewriteRule .* - [E=noabort:1]
RewriteRule .* - [E=noconntimeout:1]
PHP Requirements [Apache & Litespeed]
i.e.
IfModule php7_module

 -php_flag display_errors On (for troubleshooting purposes)

 -php_value max_execution_time 4300

 -php_value max_input_time 8600

 -php_value max_input_vars 1000

 -php_value memory_limit 8192M (2048M is minimum)

 -php_value session.gc_maxlifetime 1440

 -php_value session.save_path "/tmp"

 -php_value upload_max_filesize 100M (based on maximum tariff size)

 -php_value date.timezone "America/Toronto" (adjust to your TZ)

 -php_value post_max_size 100M (based on maximum tariff size)

 -php_flag zlib.output_compression Off


IfModule

IfModule lsapi_module

 -php_flag display_errors On (for troubleshooting purposes)

 -php_value max_execution_time 4300

 -php_value max_input_time 8600

 -php_value max_input_vars 1000

 -php_value memory_limit 8192M (2048M is minimum)

 -php_value session.gc_maxlifetime 1440

 -php_value session.save_path "/tmp"

 -php_value upload_max_filesize 100M (based on maximum tariff size)

 -php_value date.timezone "America/Toronto" (adjust to your TZ)

 -php_value post_max_size 100M (based on maximum tariff size)

 -php_flag zlib.output_compression Off

IfModule
CRON Setup
Time Zone
If your hosting provider default PHP time.zone is using the incorrect timezone and also does not allow php.ini to override the time.zone you could use wHMCS configuration.php to set the CRON run default timezone:
date_default_timezone_set('America/Toronto');
Edit the timezone to the appropriate timezone of your PBX server. Save the file. Timezones should be tz format.
Ubuntu
CRON issues running cPanel on Ubuntu maybe found where you should enable normal shell for the user account in which the CRON is being run from. For Ubuntu CRON issues please contact cPanel if utilized.
WHM/cPanel Support Advice:
Autobill CRON
To be able to bill VoIP CDRs from your server module we use a script called Autobill. This script should be assigned to execute before your WHMCS daily CRON job. For instance, if your WHMCS Daily CRON is set to run at 1AM then set the CRON for Autobill to run at 12:55AM. This should allow enough time if you have many servers and domains/tenants for each server module. If you find this is not enough time then move your daily CRON in WHMCS to 2AM and your Autobill CRON at 12:45AM
Your CRON entry could be as follows: (replace MYMODULE with the server module you have installed)
55 00 * * * GET https://www.mywhmcsserver.com/modules/servers/MYMODULE/autobill.php?runfrom=cron
You may also test run your install by populating the script link into your browser. Be sure to set the next due date of the client’s VoIP product to be the current date. Running the Autobill script does not increment the products next billing date as this is done throught the WHMCS daily CRON at which time if your product is set to monthly with Generate the monthly invoice after the Autobill and change to the next due date.
One method of displaying the calculations from the CDR billing from the Autobill script is to enable the check box located within the Providers Mangement dashboard. This can be found within the Tariff Management dashboard here: Tariff Management You would then run a manual autobill run by executing https://www.mywhmcsserver.com/modules/servers/MYMODULE/autobill.php.
WHMCS System Settings / General
Ensure your WHMCS System URL is set to HTTPS.
ictVoIP Billing Module Setup
Create new Provider/PBX (i.e Telnyx - FusionPBX) (you would require a server module for your PBX or provider)
Import and map your Tariff or Rate Card CSV from your VoIP provider. Attention to the required mapped column fields from your providers CSV: /Description/Prefix/RateValue/Increment/
Setting up your Package Rates (you would require a server module for your PBX or provider)
Select the VoIP Product you created earlier here: FusionPBX Server Module
Select your Tariff that was just imported
Select the Country Code/Exit Code of your Billing Region. - if you wish to strip any leading digits of the CID and replace it with the selected Country Code then select “Check to enable: - Incorrect prefix removal / prepend Country Code” and enter the leading digit to be stripped.
Enter your Global Markup rate for this product.
Set Free minutes to 0 if none are allocatted for your product or free minutes allowed before billed if metered billing product.
Custom Package Rates [status=0] in Tariff Table Set your incremental inbound/outbound costs to sell at. ie. 0.00967 Set your custom incremental billing value in sec. ie. 6/6 or 30/6 or 1/1 If you wish to use Custom Rates for specific prefixes or regions you must set [status] column to 0 in order for those Prefixes to bill using the set custom rates.


